Free T-shirt With Purchase Upload Your Receipt

Exercise you want to let users to create and purchase a custom created t-shirt on your website? With WPForms, information technology's piece of cake to start a impress-on-need venture and make money online.
In this article, we'll show yous how to create a shirt gild form in WordPress.
Become Your Shirt Order Grade Template Now
Here'southward a tabular array of contents if you'd like to jump ahead in this tutorial:
- Create a T-Shirt Lodge Form in WordPress
- Customize the T-Shirt Style Section on Your T-Shirt Gild Form
- Customize the Payments Department
- Configure Payment Settings
- Configure Your T-Shirt Order Form Settings
- Customize Your T-Shirt Order Form's Notifications
- Configure Your Form's Confirmations
- Add together Your T-Shirt Club Form to Your Website
Why Create a T-Shirt Social club Form With WPForms?
WPForms makes it easy to create whatsoever type of online form, including a t-shirt order course.
In fact, you don't need to install a heavy eCommerce plugin on your site to allow users to create a custom t-shirt and purchase it. With WPForms, you can allow users to choose a custom style for their t-shirt, accept payment, and process aircraft without any hassle.
WPForms is the best WordPress Course Builder plugin. Get information technology for free!
Let's accept a look at how to create a t-shirt order grade in WordPress with WPForms.
How to Create a Shirt Order Course in WordPress (Pace by Step)
Follow these steps to make your shirt gild class in WordPress easily.
Step 1: Create a T-Shirt Gild Form in WordPress
The offset thing you'll demand to practise is install and activate the WPForms plugin. For more than details, see this footstep-by-step guide on how to install a plugin in WordPress.
You'll besides desire to install and actuate the payment addon you want to use to process t-shirt guild payments. WPForms supports the post-obit integrations:
- PayPal Standard
- Stripe
- Square
- Qualify.Net (Elite license only)
Yous tin can cheque out the links to a higher place for details on how to install your preferred addon.
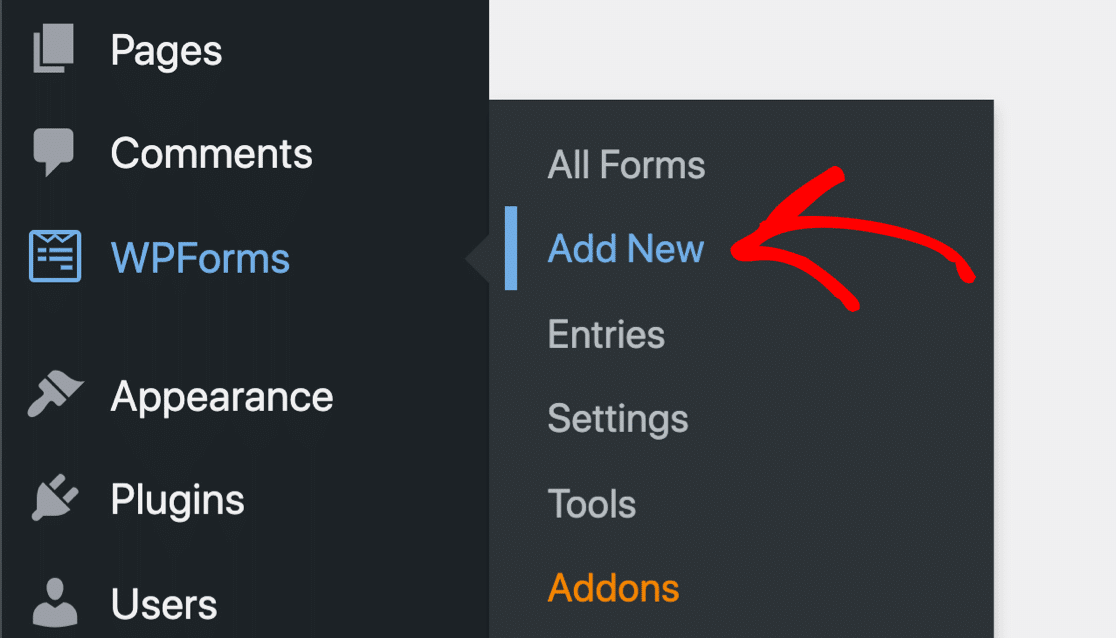
Next, go to WPForms » Add New to create a new form.
This will open up the form builder so y'all can name new your form and choose from 300+ WPForms templates. We'll utilise the Tshirt Order Form template to get started quickly.
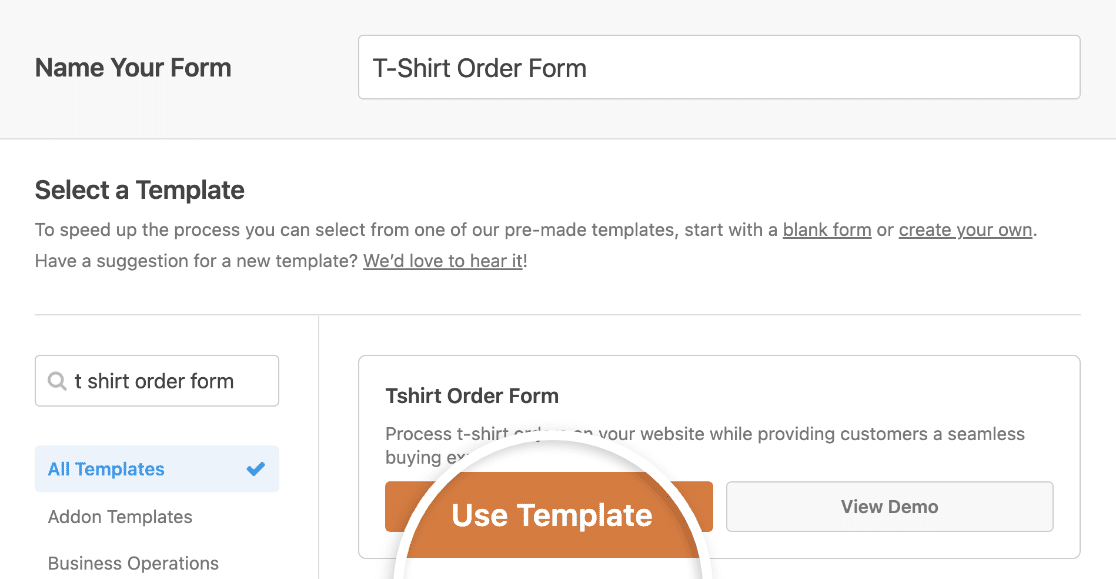
Our templates are completely customizable, though, so yous can employ whatever template you want and change it to sell t-shirts.
Step 2: Customize the T-Shirt Style Section on Your T-Shirt Order Form
The Tshirt Order Form template includes the post-obit fields:
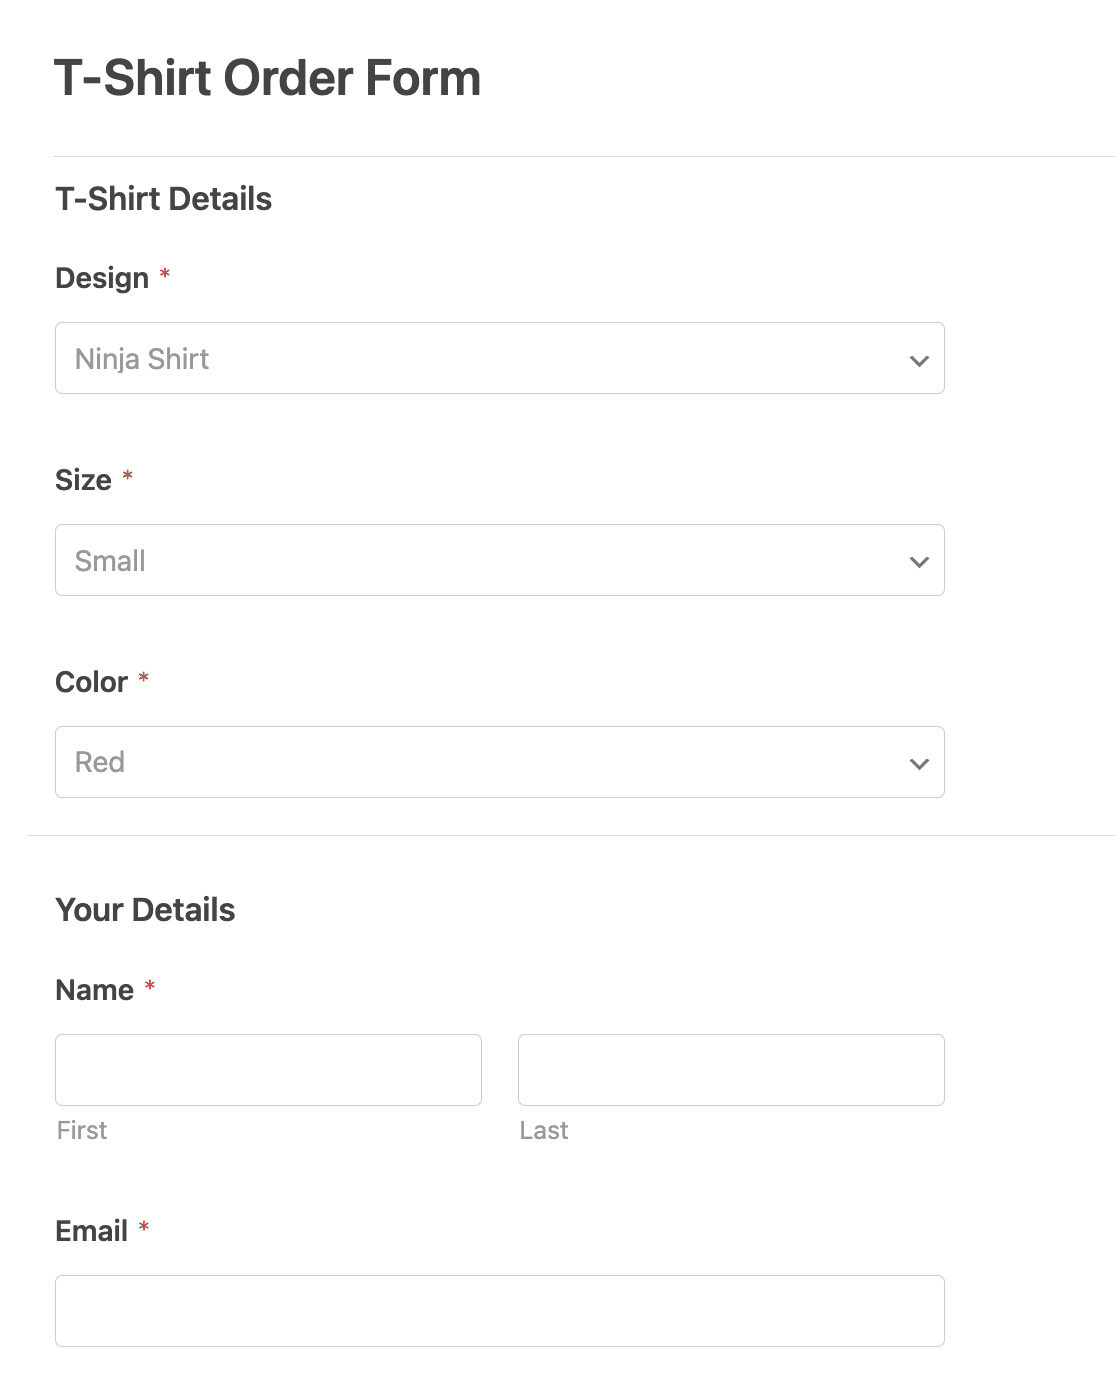
- Dropdowns for pattern, size, and color so customers can choose their shirt details.
- Name, Email, and Accost fields so y'all can collect customer data you'll need for billing and shipping.
- A Checkboxes field where customers tin specify if this purchase is a souvenir for someone else.

While the to a higher place fields requite yous a head start on creating a t-shirt guild class, feel gratis to customize the fields to suit your needs. You can add together additional fields to your order form by dragging them from the left-mitt side to the right-hand side.
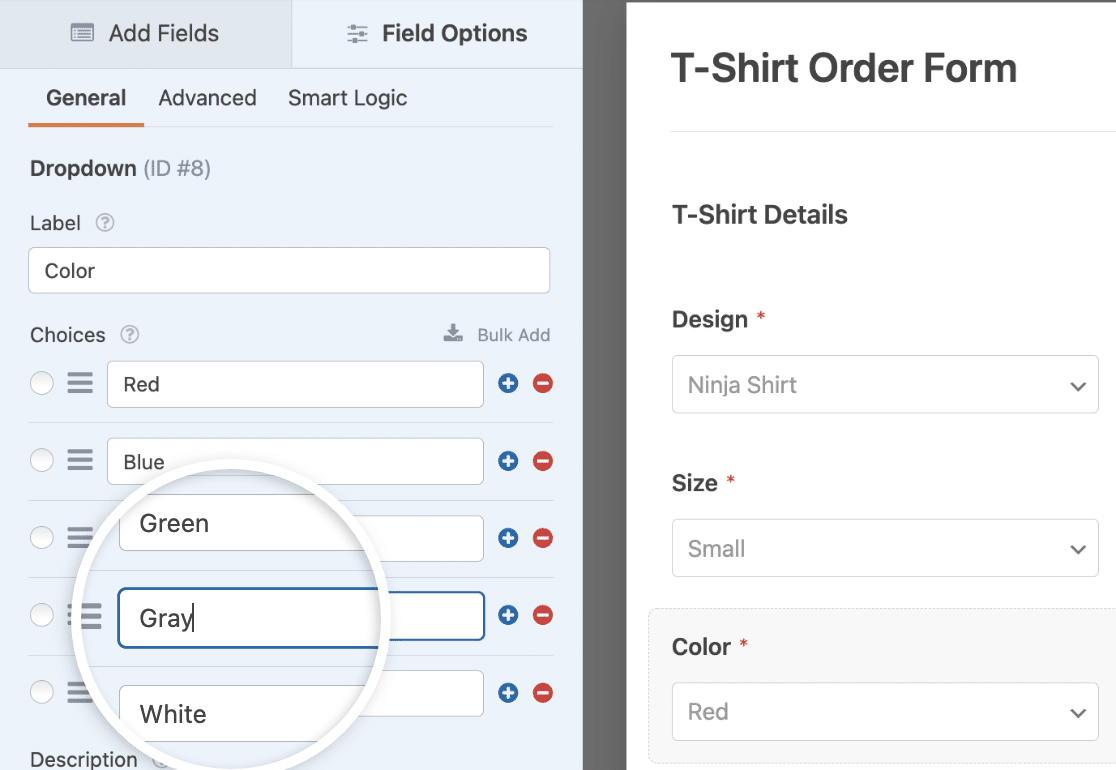
As well, to alter the t-shirt details to fit your products, simply click on the dropdowns in the preview and edit the options on the left.
If you take images of your t-shirts you want people to cull from, check out this tutorial on how to add together an prototype next to radio buttons in WordPress forms.
Step 3: Customize the Payments Section
Adjacent, we'll add together some other section to our form for payments. Drag and drop a Section Divider into your form. Identify it below the "Your Details" section then there'south a clear distinction.
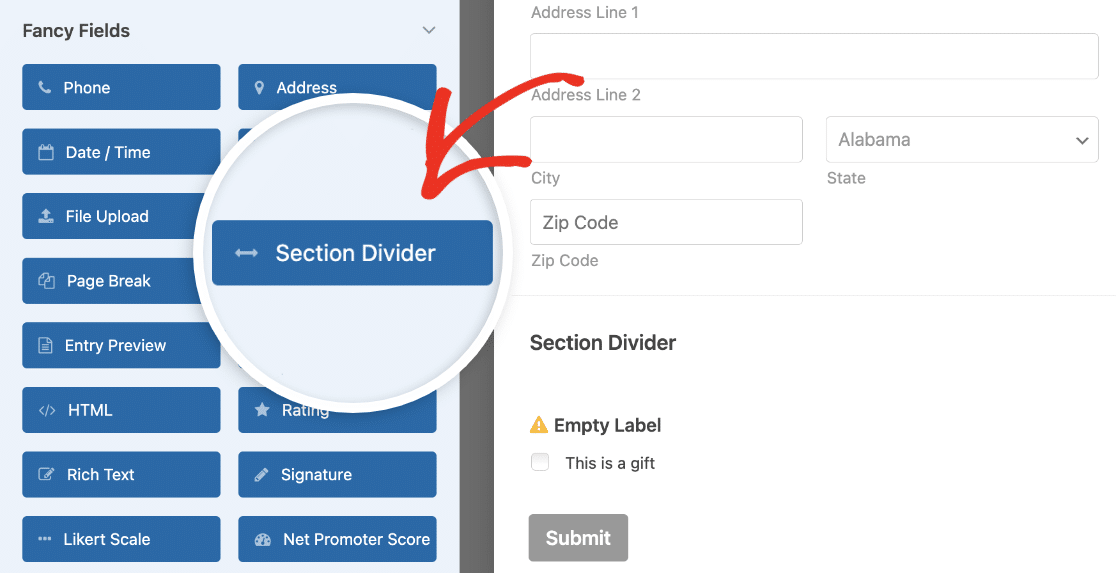
You can change the label and description of the field past clicking on it.

To process payments on your club form and to allow users to submit their contact details, we'll take to add the following class fields:
- Single Item
- Credit Card (for Stripe, Foursquare, or Qualify.Net payments)
After adding the Single Item course field, yous can click on it to customize the label and item price.
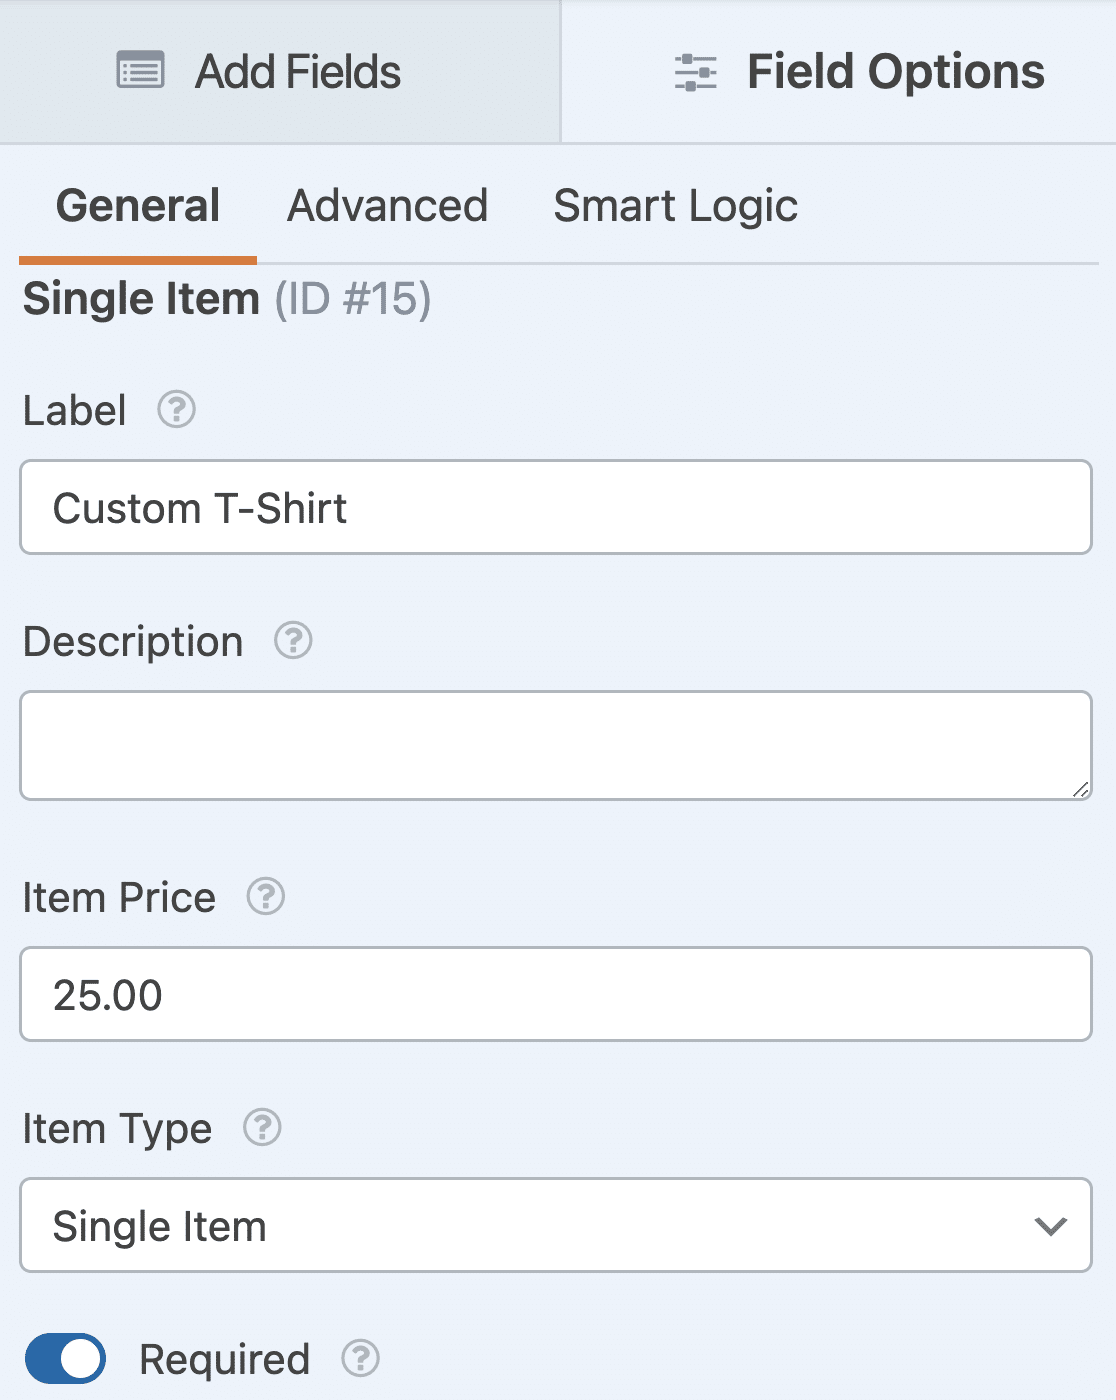
Make sure to click on the Required toggle so the toll of the t-shirt automatically calculates and your customer is charged properly.
You may desire to check out our tutorial on how to add together production options that change the total cost. This is a great play tricks to do to improve the user experience and lower your shopping cart abandonment rate.
Click Save.
Step 4: Configure Payment Settings
Now that we've added all of the necessary fields to the course, let's go to the Payments tab in the form editor to configure the payments settings.
In this example, we'll choose PayPal Standard to process payments.
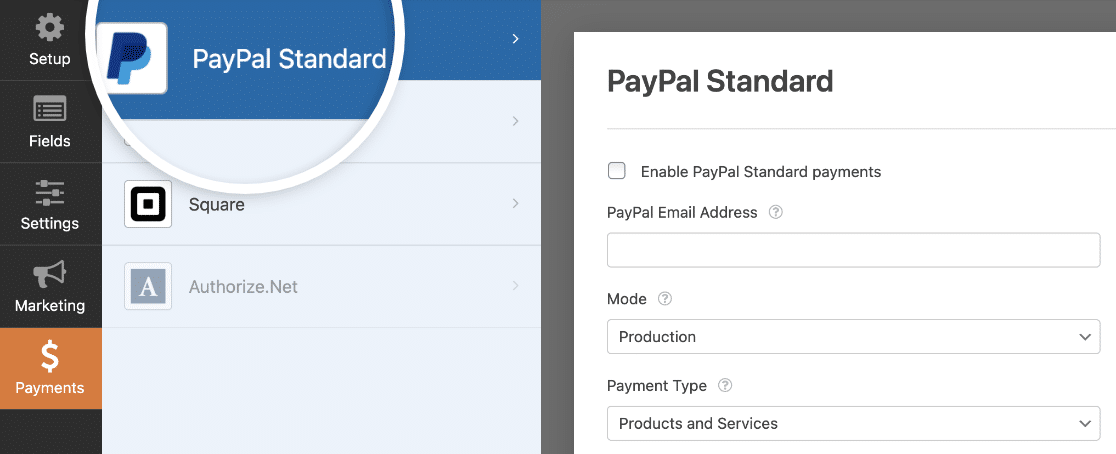
Here, y'all'll need to configure the post-obit:
- Select the checkbox nearly Enable PayPal Standard Payments.
- Enter your PayPal e-mail accost to receive payments.
- From the Mode dropdown menu, select Product to receive payments.
- Choose Products and Services equally the payment type.
- Under Shipping, choose Inquire for an address and require it so you don't accept to ask for shipping details on your T-shirt order grade. Instead, your customers volition fill out their shipping details during PayPal's checkout procedure.
Click Salve one time y'all're done.
Step 5: Configure Your T-Shirt Social club Form Settings
To start, go to Settings » Full general.
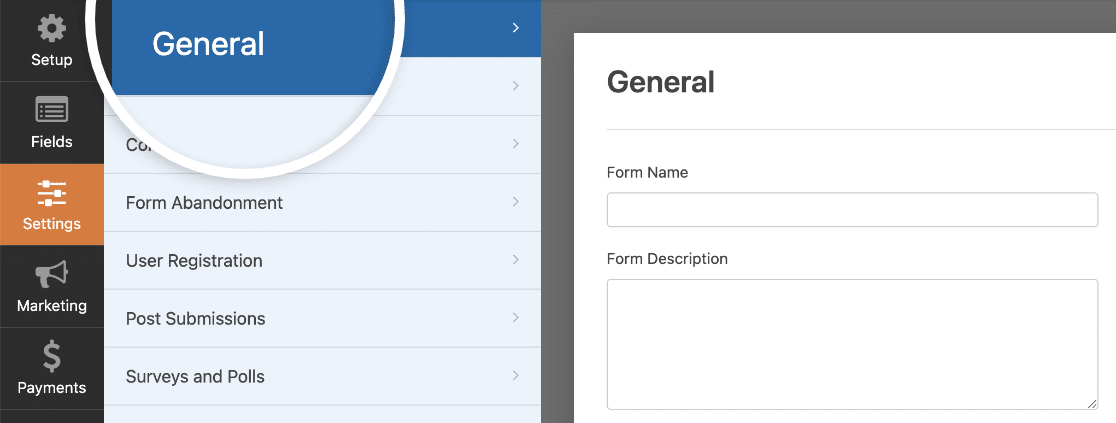
Here yous tin can configure the post-obit:
- Form Proper noun— Alter the name of your form here if y'all'd like.
- Course Description — Requite your form a clarification.
- Submit Push button Text — Customize the copy on the submit push button.
- Submit Button Processing Text — Alter the text that volition be visible while your form is being submitted.
- Enable anti-spam protection — Stop contact form spam with the anti-spam feature, hCaptcha, or Google reCAPTCHA. The anti-spam setting is automatically enabled on all new forms.
Yous'll besides exist able to make changes to the avant-garde settings:
- Form CSS Classes — Add custom CSS to your form.
- Submit Button CSS Grade — Add CSS to your submit button.
- Enable Dynamic Fields Population — You tin utilise this setting to car-make full some fields in your form.
- Enable AJAX form submission —Enable AJAX settings with no folio reload.
- Disable storing entry data in WordPress — You can disable the storing of entry information and user details, such as IP addresses and user agents, in an endeavour to comply with GDPR requirements. Cheque out our step-past-pace instructions on how to add together a GDPR agreement field to your form.
Click Relieve to go along your changes.
Step vi: Customize Your T-Shirt Club Grade's Notifications
Notifications are a swell manner to send an e-mail whenever an lodge is submitted on your website.
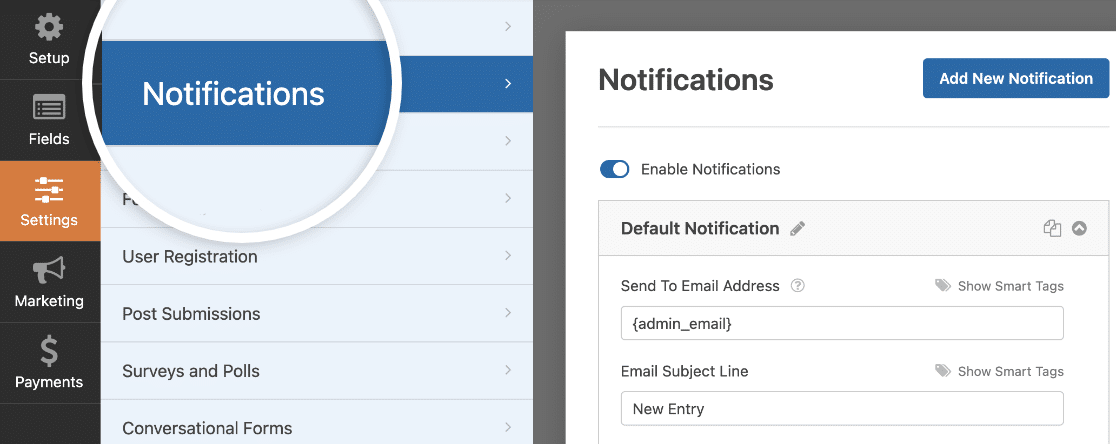
In fact, unless y'all disable this feature, whenever someone submits a t-shirt order course on your site, you'll get a notification most information technology.
If you use Smart Tags, you tin can likewise ship a notification to the site visitor when they brand a purchase, letting them know you lot received their order and payment and volition exist in contact shortly. This assures people their club form has gone through properly.
For help with this step, check out our documentation on how to fix up form notifications in WordPress.
And if you need to send more than 1 notification, for example to yourself, the t-shirt manufacturer, and your customer, check out our step-by-step tutorial on how to transport multiple form notifications in WordPress.
Lastly, if you want to keep branding across your emails consistent, you can check out this guide on adding a custom header to your e-mail template.
Step 7: Configure Your Form's Confirmations
Form confirmations are messages that display to site visitors one time they submit a t-shirt order form on your website. They allow people know that their course has been processed and offer you the take chances to let them know what the next steps are.
WPForms has 3 confirmation types:
- Message. This is the default confirmation type in WPForms. When a customer submits a t-shirt lodge form, a simple bulletin confirmation will appear letting them know their order and payment were processed. Expect here for some bully success messages to aid boost customer happiness.
- Show Page. This confirmation type will take site visitors to a specific spider web page on your site thanking them for their purchase. For help doing this, check out our tutorial on redirecting customers to a Thank You page. In addition, exist sure to check out our commodity on creating effective Thanks pages for boosting customer loyalty.
- Go to URL (Redirect). This option is used when you want to ship site visitors to a unlike website.
Let's see how to prepare a simple form confirmation in WPForms so yous can customize the message site visitors will see when they purchase a t-shirt using your club form.
To kickoff, click on the Confirmation tab in the form editor nether Settings.

Side by side, select the confirmation type you'd like to create. For this case, we'll select Message.
So, customize the confirmation bulletin to your liking and click Salvage.
If you want to brandish unlike confirmations to site visitors based on their beliefs, be sure to read upwards on how to create conditional form confirmations.
At present you're set to add your t-shirt order form to your website.
Step 8: Add Your T-Shirt Order Grade to Your Website
At present that you've congenital your shirt order form using the template, you lot can add it to your WordPress website. WPForms lets you lot add your forms to multiple locations on your site, including your blog posts, pages, and even sidebar widgets.
To begin, create a new folio or post in WordPress, or simply update an existing i. After that, click on the button to add a new block and cull the WPForms icon.
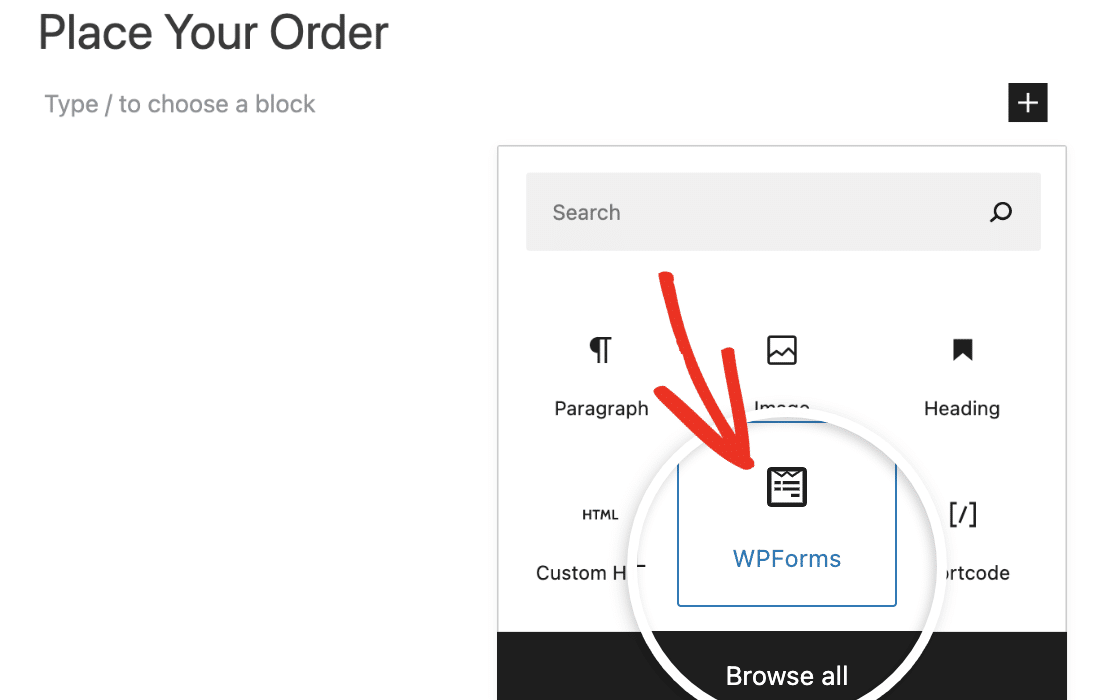
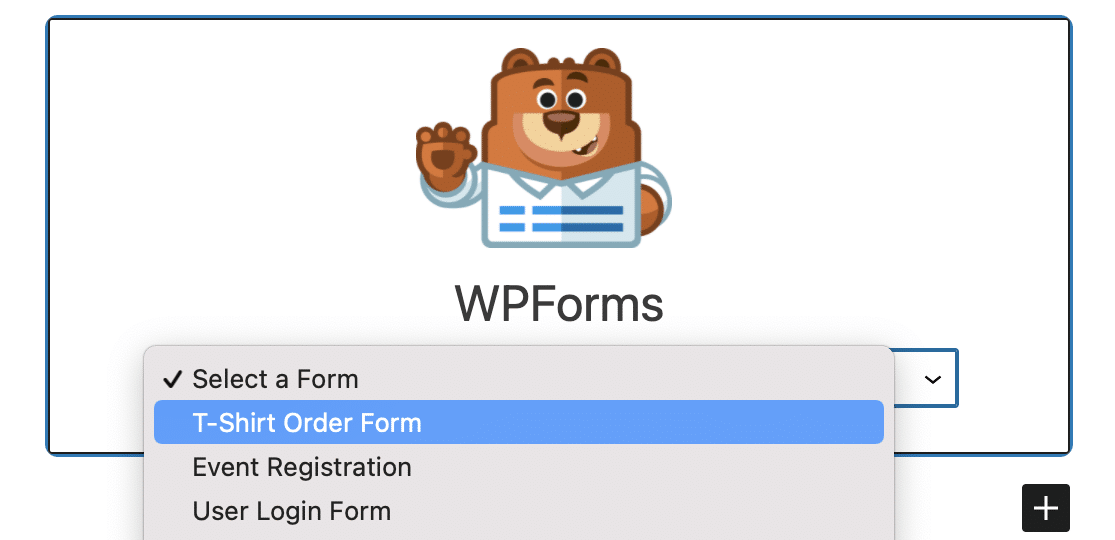
The easy-to-utilize WPForms widget will appear inside your cake. Click on the dropdown and pick the course you want to insert into your page.
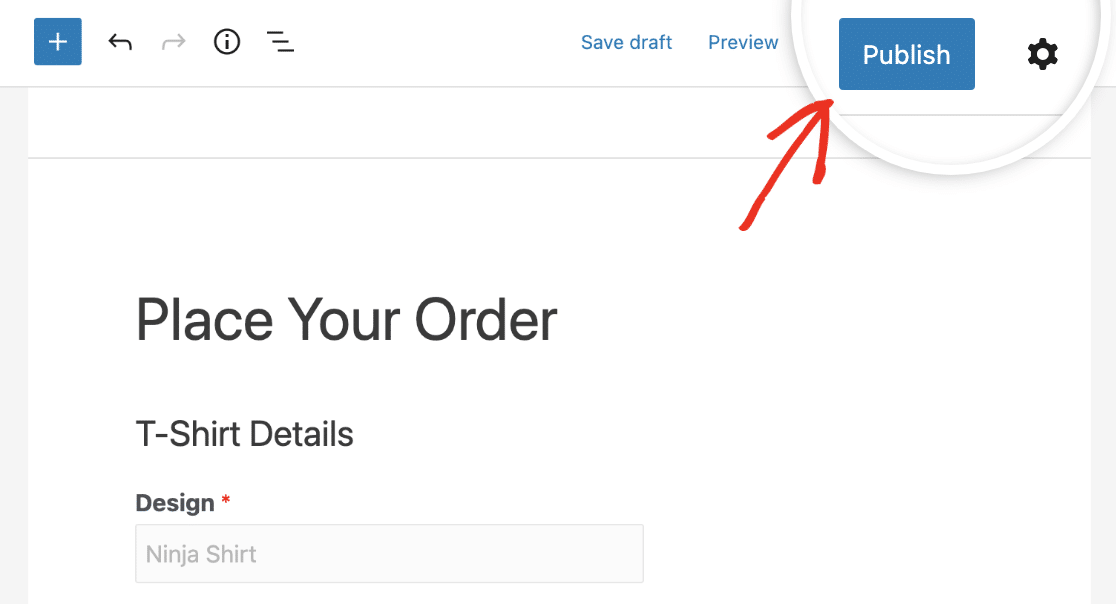
Now you'll see your shirt order class every bit it'll appear on your website. If you're satisfied with the manner your grade looks, hit Update or Publish, and your form will become live on the Internet.
To view shirt order form entries after they're submitted, check out this consummate guide to form entries.
For example, y'all can view, search for, filter, print, and delete any entries, making the shirt order process that much easier.
Go Your Shirt Lodge Grade Template At present
Side by side, Create Automatic T-Shirt Order Receipts
And there yous accept it! And then you at present know how to create a t-shirt order form in WordPress.
Besides, to brand sure your customers get their t-shirt order form receipts, cheque out this tutorial on how to automatically send a WordPress gild form e-mail receipt. And if you prefer to invoice customers subsequently for their purchases, be sure to see this roundup of the best invoicing software for your WordPress order forms.
So, what are you waiting for? Become started with the near powerful WordPress forms plugin today.
And don't forget, if you lot similar this article, and so please follow united states of america on Facebook and Twitter.
Source: https://wpforms.com/how-to-create-a-t-shirt-order-form-in-wordpress-step-by-step/
0 Response to "Free T-shirt With Purchase Upload Your Receipt"
Enviar um comentário